Rocky Linux 10 is the latest stable, community-driven enterprise Linux distribution built as a downstream rebuild of Red Hat Enterprise Linux 10, released on June 11, 2025, and this guide walks you through a complete minimal server installation.
Most sysadmins treat OS installation like a checkbox; they click through fast, accept defaults, and move on, but the problem is that those defaults are often not what you actually want, so you end up fixing things later that the installer decided for you.
If you spend just 10 extra minutes during setup, especially on disk partitioning, hostname, and networking, you save yourself a lot of trouble later. If you skip it, you might hit issues like /var filling up or seeing localhost in every log, which makes debugging harder and looks unprofessional.
This guide walks through a complete Rocky Linux 10 minimal server installation, every screen in order, with the decisions explained rather than just described. Tested on Rocky Linux 10.0 on both bare metal and a DigitalOcean VPS.
Check Hardware Requirements
Before downloading anything, verify your CPU supports x86-64-v3 instructions, because Rocky Linux 10 dropped support for older x86-64-v2 processors, which covers anything older than Intel Haswell (2013) or AMD Excavator (2015). If your hardware predates that, Rocky Linux 9 is still supported until 2032.
First, run this on an existing Linux system to check:
grep -o 'avx2' /proc/cpuinfo | head -1
Output:
avx2
If that returns avx2, your CPU qualifies. If it returns nothing, stay on Rocky Linux 9, because beyond the CPU, you need at least 10GB of disk and 1.5GB of RAM for a minimal install, though any real server workload will need more.
Download Rocky Linux 10
Head to the Rocky Linux Downloads page and grab the Minimal ISO for x86_64, which sits around 1.7GB and contains only what’s needed to boot the installer. It pulls the minimal package set from the local media, so no internet connection is required during install.
Avoid the Boot ISO for a server build, because it streams packages from the network during installation, which means a slow or interrupted connection can stall the install halfway through.
The DVD ISO at around 10GB is the offline-complete option if you’re installing across multiple machines on the same network and want to avoid external bandwidth.
First, identify your USB device path with lsblk:
lsblk
Output:
NAME        MAJ:MIN RM   SIZE RO TYPE MOUNTPOINTS
sda           8:0    0   500G  0 disk
├─sda1        8:1    0   499G  0 part /
└─sda2        8:2    0     1G  0 part [SWAP]
sdb           8:16   1    16G  1 disk
└─sdb1        8:17   1    16G  1 part /media/usb
The RM column shows 1 for removable devices, so sdb here is the USB drive. Your device will likely be /dev/sdb or /dev/sdc depending on how many disks are already attached.
Write the Minimal ISO to it:
sudo dd if=Rocky-10.0-x86_64-minimal.iso of=/dev/sdb bs=4M status=progress && sync
The sync at the end flushes the write buffer so the USB is fully written before you pull it out. If you skip it and yank the drive early, the ISO writes incomplete and the boot fails silently.
/dev/sda by mistake will overwrite your system disk.Boot the Installer
Insert the USB, restart, and boot from it using your system’s boot menu (usually F12, F2, or Del depending on the motherboard). When the Rocky Linux boot screen appears, select Install Rocky Linux 10.0 and press Enter.

The Anaconda installer loads. It’s the same installer used by RHEL and Fedora, so nothing here will look unfamiliar if you’ve installed either of those.
Select Language
The first screen asks for your installation language, so select English (United States) and click Continue. The language here controls the installer UI only, not the system locale, which you configure separately.

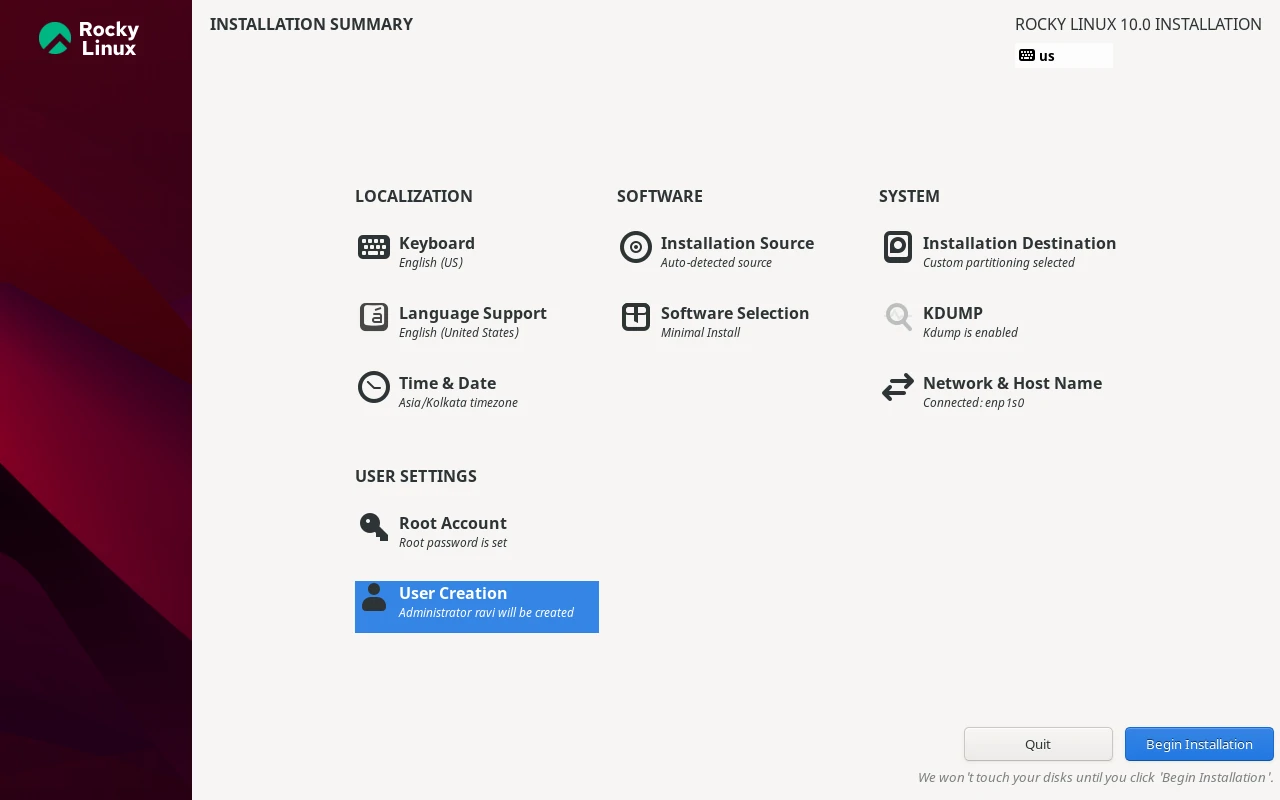
Installation Summary Screen
After selecting language, you land on the Installation Summary screen, which is the central hub for every configuration decision. Nothing installs until you click Begin Installation at the bottom, so take your time here.
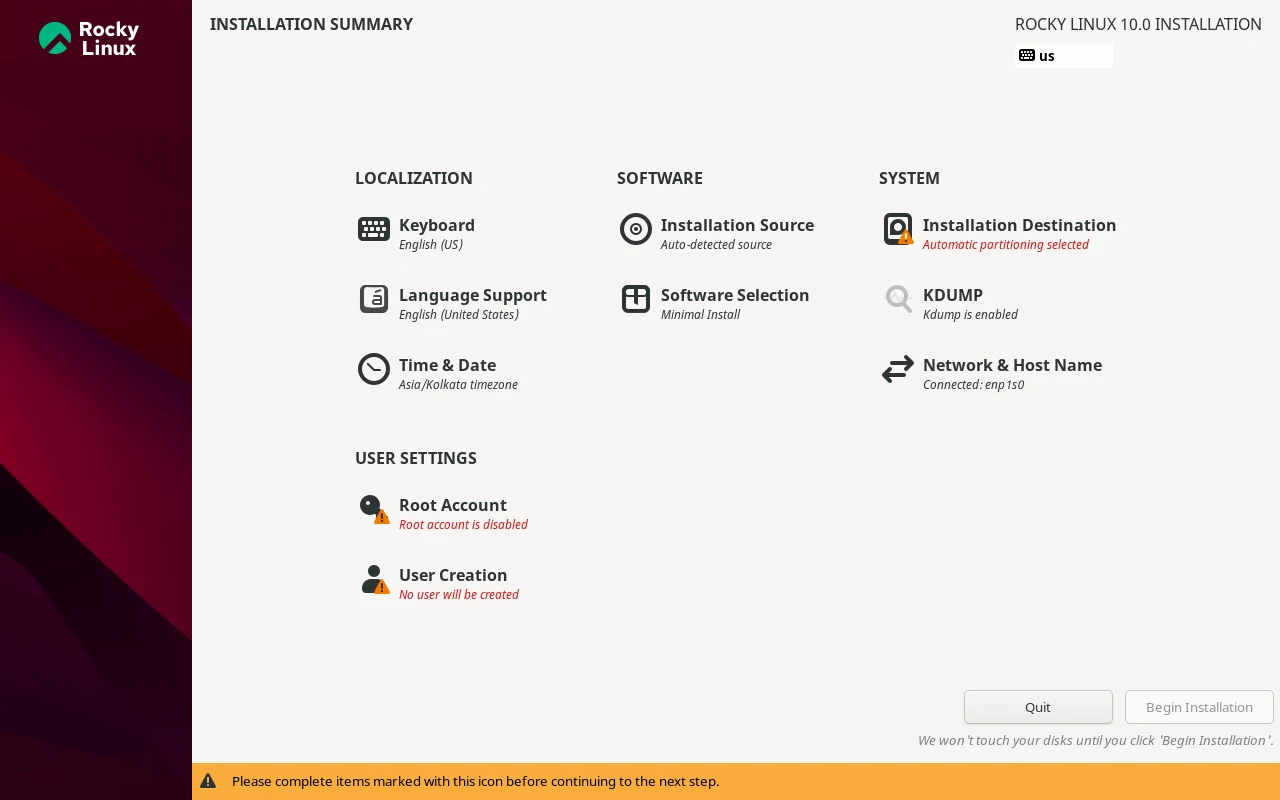
Work through the sections below in order.
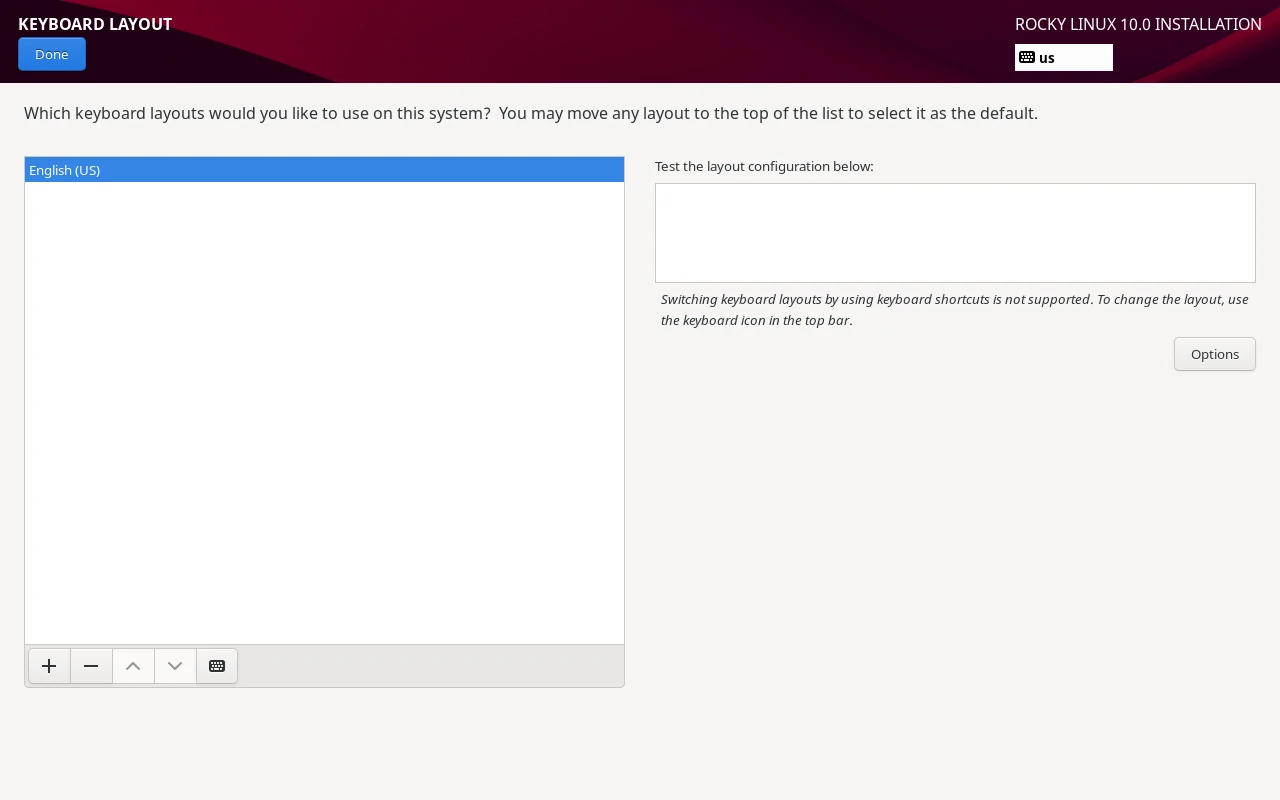
Configure Keyboard and Time
Click Keyboard, verify the layout matches your hardware, and click Done.
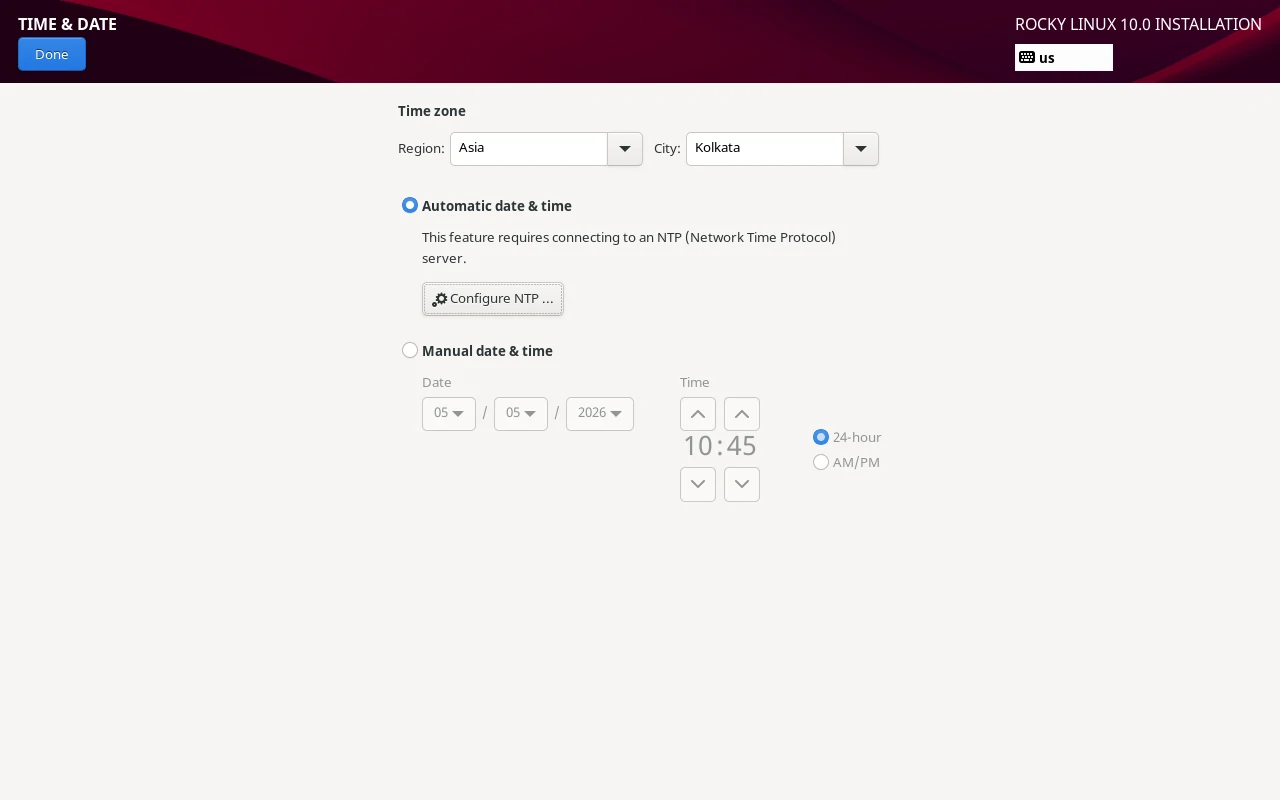
Then click Time & Date, select your timezone from the map, and click Done. NTP synchronization matters more than most people realize on a server – certificate validation, log timestamps, and Kerberos authentication all depend on an accurate clock.
Select Software: Minimal Install
Click Software Selection. On the left panel, select Minimal Install and leave every add-on on the right unchecked.
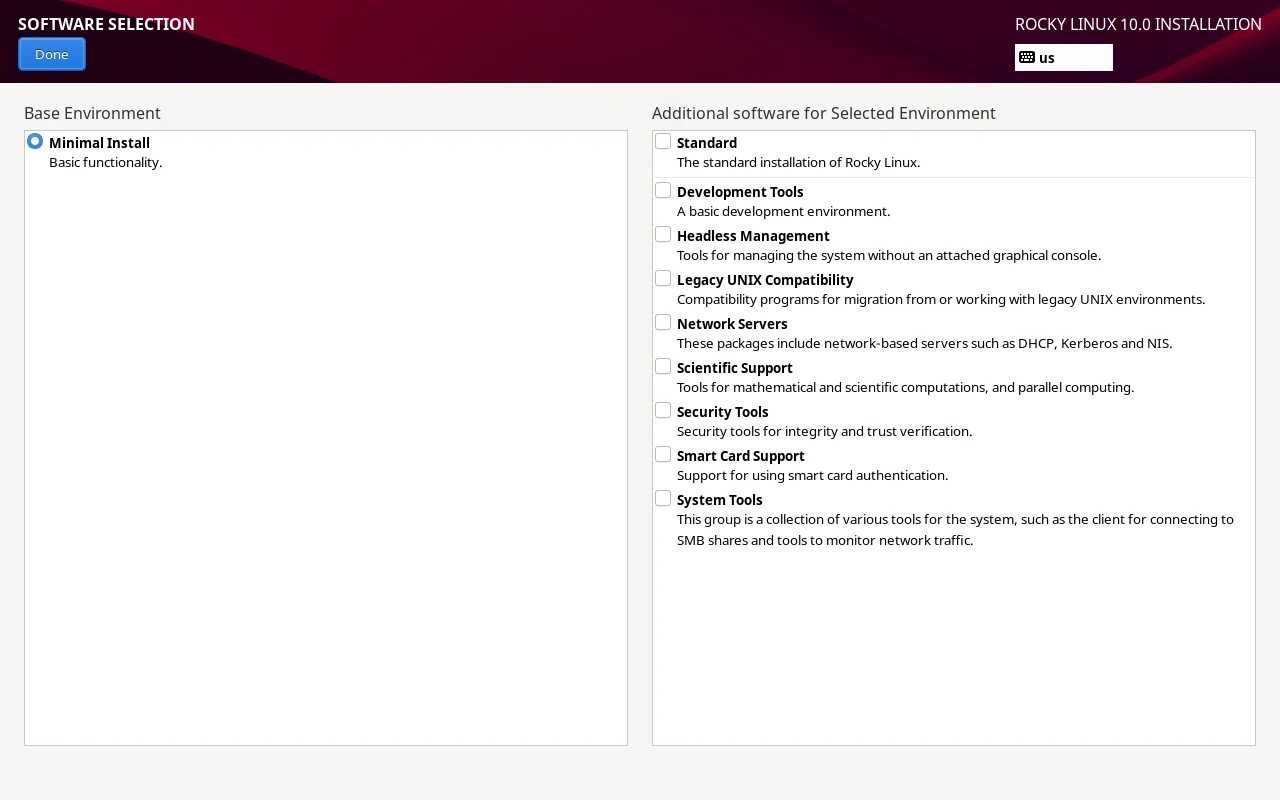
A minimal install lands around 300 packages, which gives you a bootable system with dnf, systemd, sshd, and the basics, nothing more. You can install every additional package you need after the fact, but you can’t easily remove packages the installer chose for you without breaking things.
dnf, systemctl, and the full toolkit a sysadmin uses daily.Partition the Disk
Click Installation Destination, select your disk, and choose how to partition it.

Automatic partitioning works fine for most servers, because the installer creates a /boot partition outside LVM, a /boot/efi partition for UEFI systems, and an LVM volume group with / (root) and swap inside it. XFS is the default filesystem on all LVM volumes, and that’s the right call for a server.
Manual partitioning makes sense when you need to isolate specific mount points. A dedicated /var partition prevents log growth from filling the root filesystem. A dedicated /home partition makes user data management cleaner.
To go manual, select Custom and click Done to enter the partitioning editor.
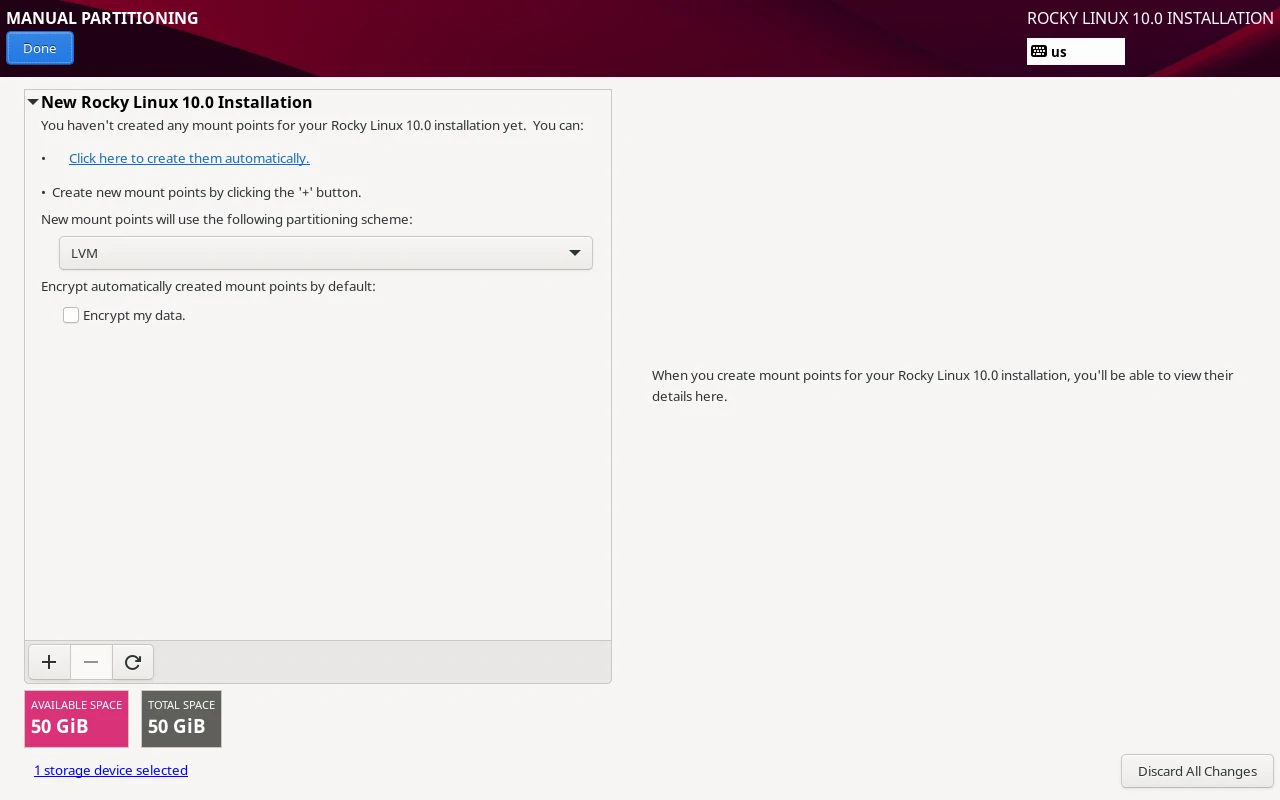
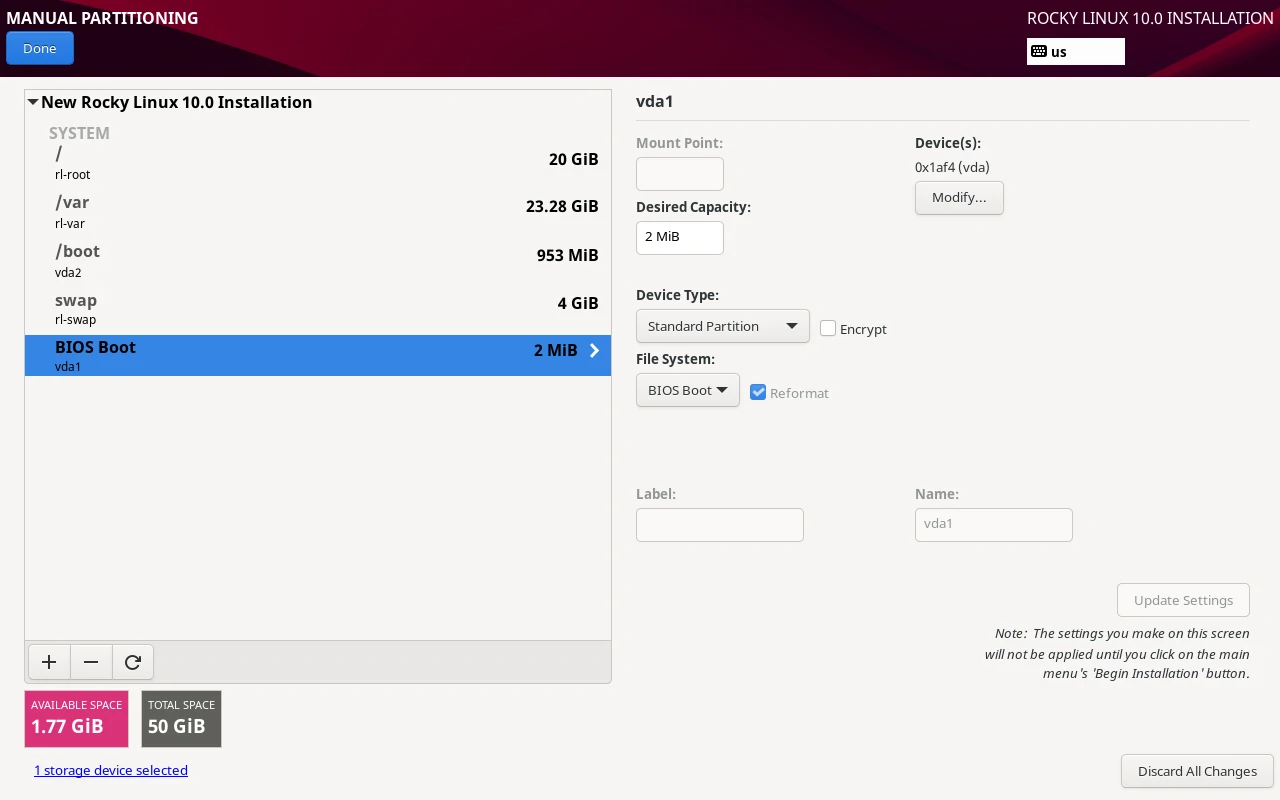
For a general-purpose server, with a 50GB disk with 8GB RAM, a solid manual layout looks like this:
| Mount Point | Size | Type |
|---|---|---|
/boot |
1GB | Standard ext4 |
BIOS Boot |
2MB | Standard Partition |
/ |
20GB | LVM / XFS |
/var |
25GB | LVM / XFS |
swap |
4GB | LVM |
A few things you’ll notice that differ from a UEFI system. There’s no /boot/efi partition because Anaconda only creates that when the installer boots in UEFI mode. On a BIOS/legacy system you get a standard MBR bootloader instead.
The BIOS Boot partition at 2 MiB is added automatically by Anaconda to hold the GRUB bootloader on BIOS/MBR systems, you don’t create it manually and don’t need to touch it.
The /boot lands at 953 MiB rather than a round 1 GiB, which is just Anaconda’s default and is perfectly fine. /var settles at 23.28 GiB rather than the 25 GiB you entered because Anaconda redistributes a small amount of space after creating the BIOS Boot partition and accounting for LVM metadata overhead.
The 1.77 GiB showing as available space at the bottom left is that remainder, and it’s normal to leave it unallocated.
The /var gets the largest slice because that’s where package caches, logs, and container storage all land, and it’s the mount point most likely to fill up unexpectedly on a busy server. Keeping it separate means a log flood can’t take down the entire root filesystem.
Swap is set to 4 GiB rather than the full 8 GiB of RAM — on a server with 8 GiB, you have enough physical memory that swap should rarely be touched, and if your server is regularly hitting swap, the fix is more RAM, not more swap.
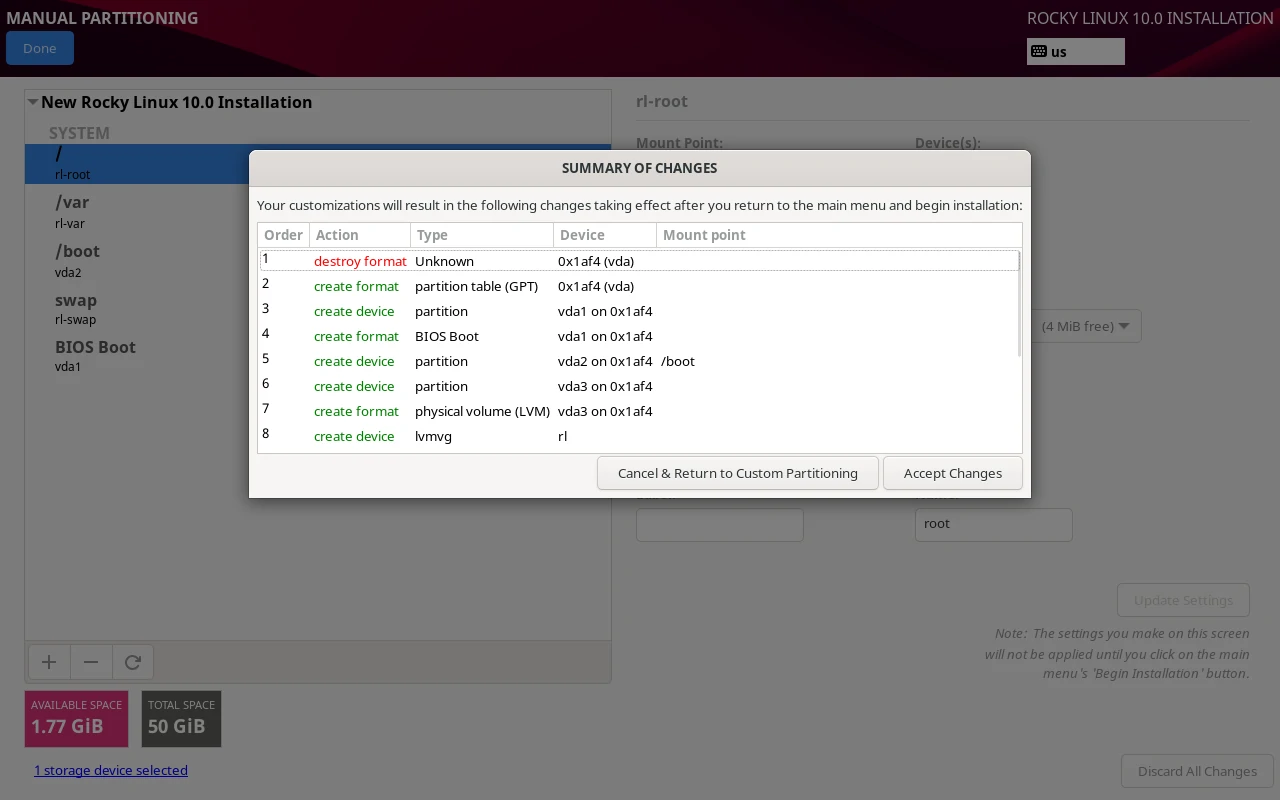
Click Done, review the summary, and click Accept Changes to write the partition table.
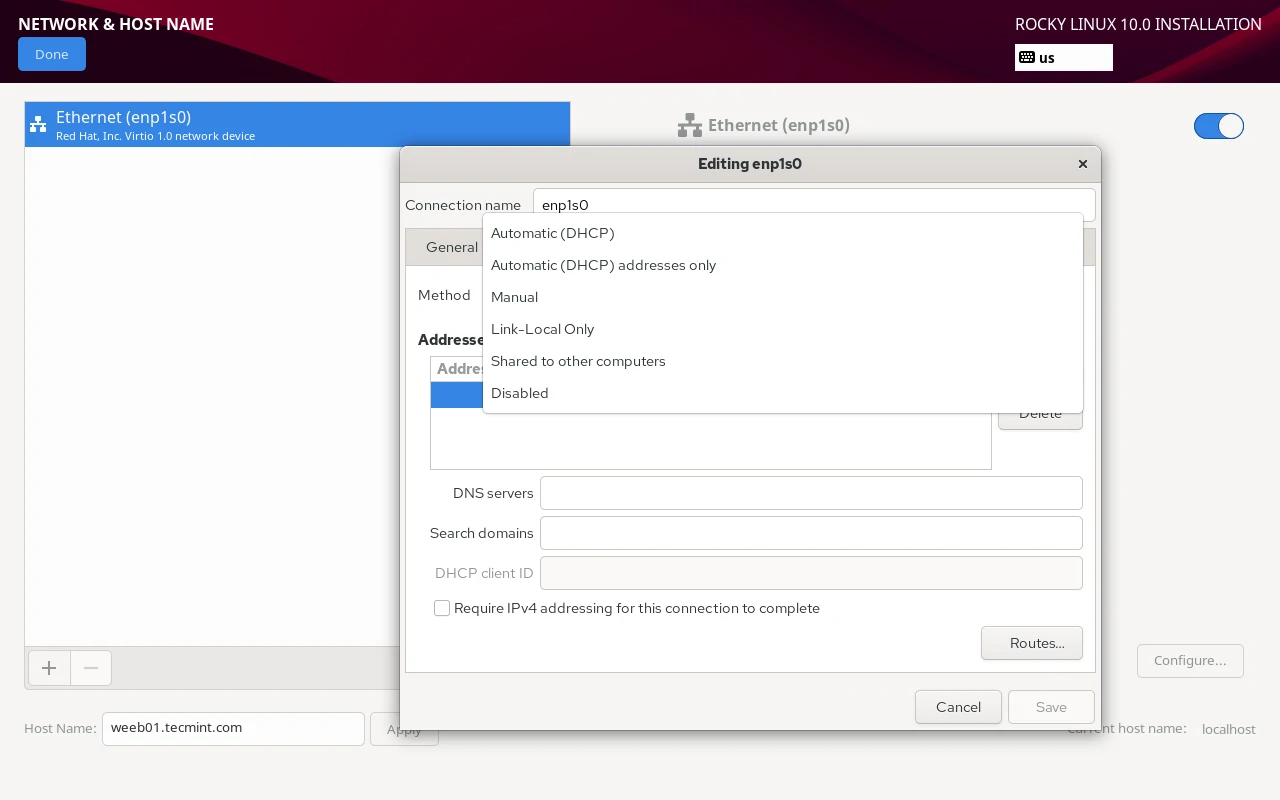
Configure Network and Hostname
Click Network & Hostname and at the bottom, type your server’s FQDN (Fully Qualified Domain Name) in the hostname field, like web01.example.com, and click Apply. Toggle the Ethernet switch to ON so the interface comes up during installation.
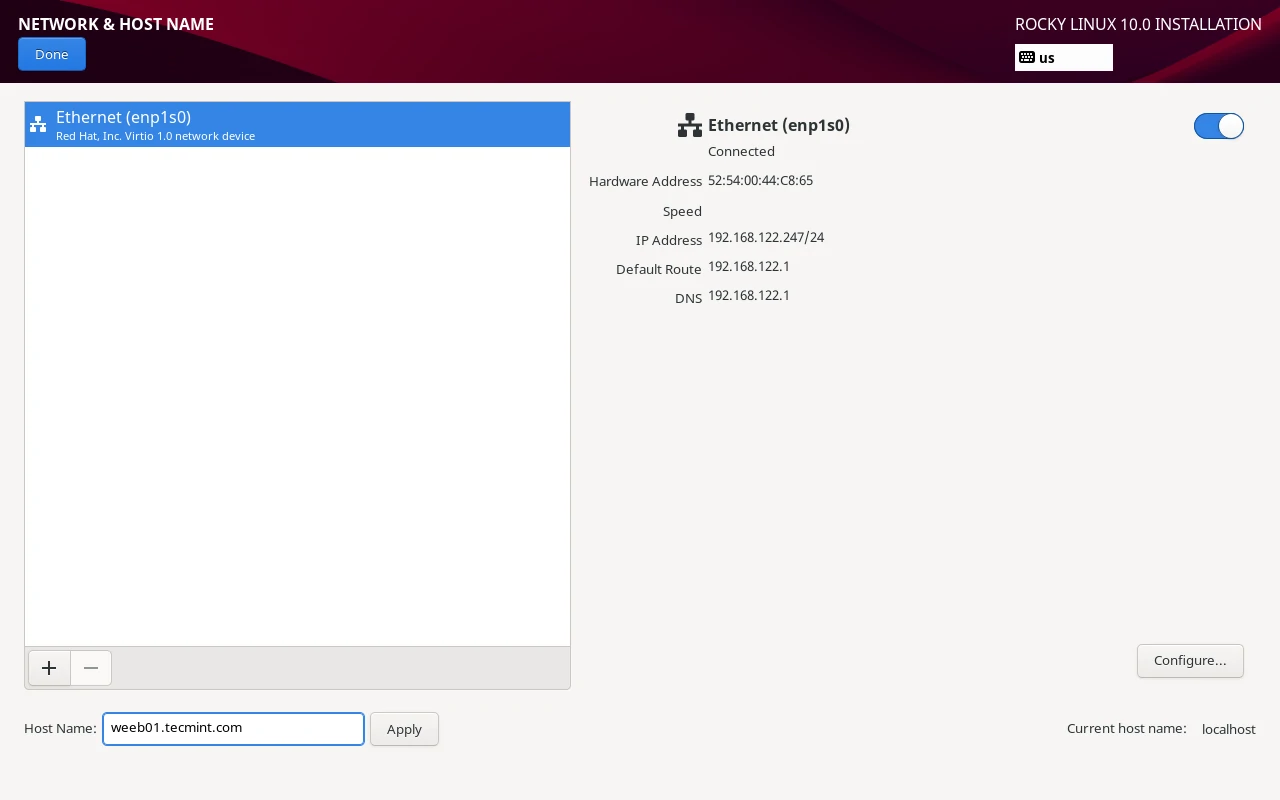
For a server that needs a static IP, click Configure next to the interface, go to the IPv4 Settings tab, switch Method to Manual, and fill in the address, netmask, gateway, and DNS. Click Save, then toggle the Ethernet switch OFF and back ON to apply.
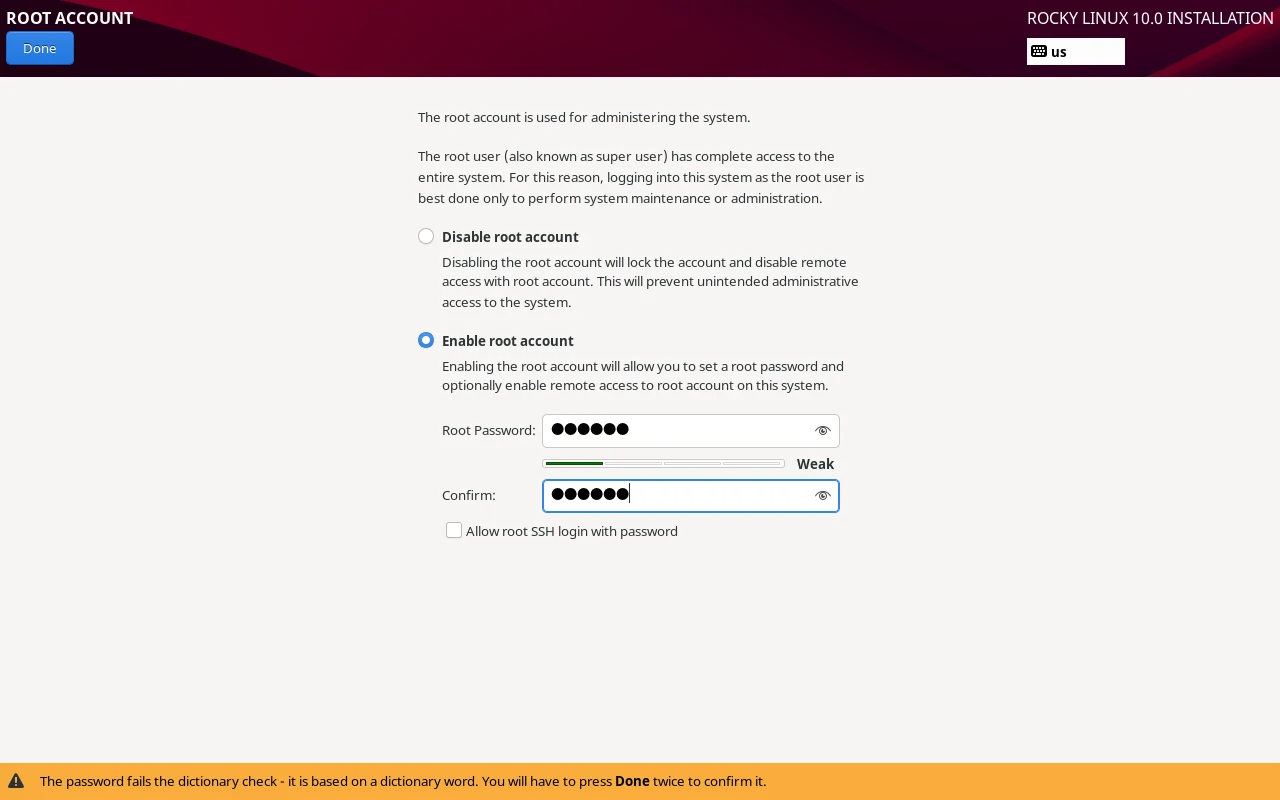
Set Root Password and Create a User
Click Root Password and set a strong password, or check Lock root account if you prefer to manage everything through sudo from a regular user account, which is the more secure production approach.
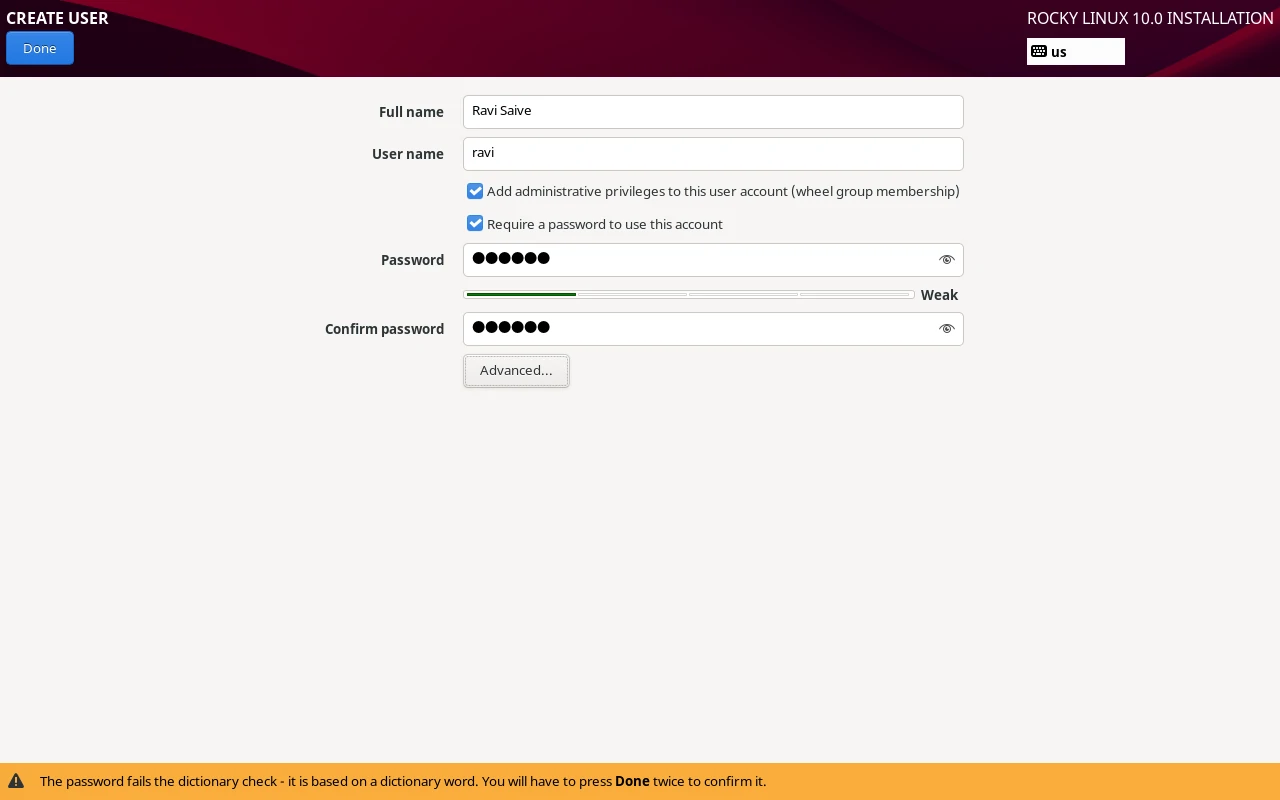
Then click User Creation and enter a username and password, and check Make this user administrator, which adds the account to the wheel group.
The sudo prefix runs commands with root privileges, which is required for anything that touches system files, installs packages, or manages services. If you see Permission denied after running a system command, you either forgot sudo or your user isn’t in the wheel group.
Begin Installation
Everything is configured. Click Begin Installation.
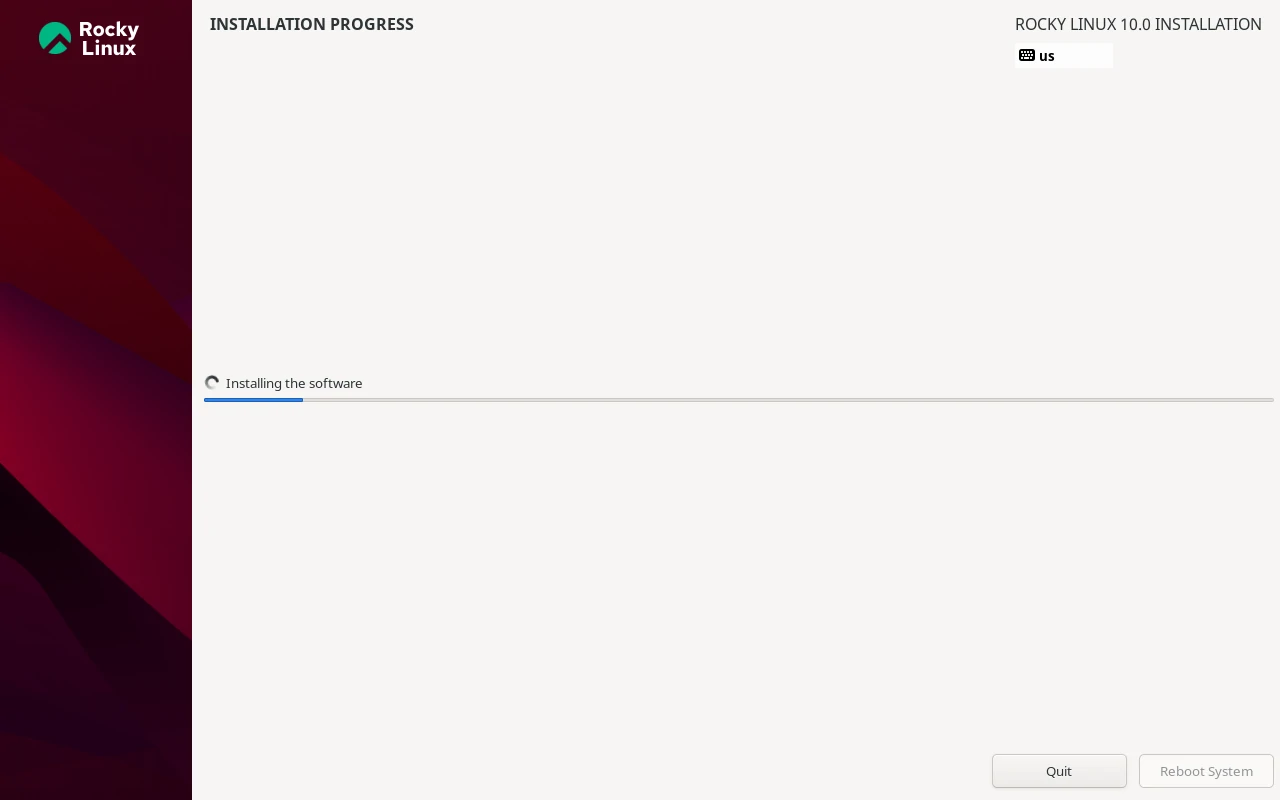
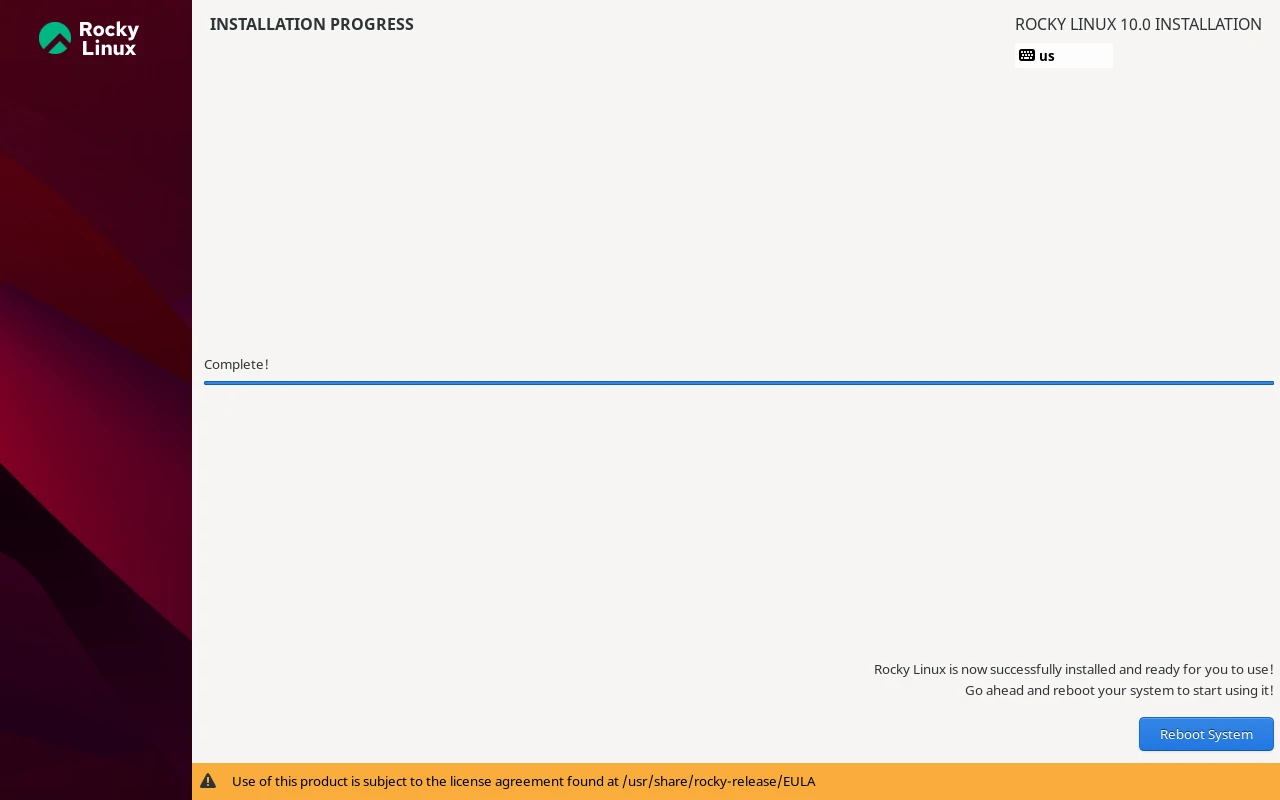
The installer writes partitions, installs packages, and configures the bootloader. On a modern SSD this takes 5 to 10 minutes. On spinning disk, plan for 20 to 30 minutes. When it finishes, click Reboot System, remove the USB drive, and let the machine boot into Rocky Linux 10.
First Commands After Boot
Log in with the user account you created and run a full system update immediately to pull in any security fixes released since the ISO was built:
sudo dnf update -y
Then verify you’re on what you think you’re on:
cat /etc/rocky-release
Check the hostname is correct:
hostnamectl
If the hostname is wrong, fix it now before anything else gets configured:
sudo hostnamectl set-hostname web01.example.com
Enable and start the firewall:
sudo systemctl enable --now firewalld
sudo firewall-cmd --state
A minimal install doesn’t always activate the firewall by default, and a server with no firewall on a public IP is not a server you want to leave unattended.
Conclusion
You now have a minimal Rocky Linux 10 server with a current package state, an active firewall, a proper hostname, and an admin user account, which is the right foundation for anything you build on top of it.
The natural next step is hardening SSH before this server faces any public traffic — disabling root login, switching to key-based authentication, and locking down sshd_config so password brute-force attacks become irrelevant.
If you want to do that properly, rather than just copy-pasting a few config lines and hoping for the best, the SSH Complete Course at Pro TecMint covers everything from your first key pair through tunneling, jump hosts, and production hardening across 54 chapters.
What tripped you up during the install, or what does your standard post-install checklist look like? Share it in the comments – every sysadmin has a slightly different set of first steps, and it’s genuinely useful to compare notes.


